

ই-মেল সংক্রান্ত একটি সমস্যা আমাদের অনেককেই মাঝে মধ্যে খুব যন্ত্রণা দেয় । সেটি হল, আমাদের প্রত্যেককেরই একটি করে ব্যক্তিগত ই-মেল আই.ডি. আছে যেটি আমরা বেশীরভাগ সময় ব্যবহার করি । আর রয়েছে আমাদের অফিসের ই-মেল আই.ডি. যা আমাদের বাধ্য হয়ে খুলে রাখতে হয় কখন কি মেল আসে সেটির উপর নজর রাখার জন্য । মেল পড়ার সময় সমস্যা তৈরী হয় না , তৈরী হয় মেল পাঠানোর সময় । আমরা অনেক সময়ই অফিসিয়াল মেল পাঠাতে গিয়ে নিজের ব্যক্তিগত মেল আই.ডি. থেকে সেটা পাঠিয়ে ফেলি । ফলে অনেক ক্ষেত্রেই মেল ঊর্দ্ধতন কর্তৃপক্ষ দেখেন না । আবার কিছু কিছু ক্ষেত্রে আমাদের এই সব ভুলের জন্য তিরষ্কৃতও হতে হয় ।
আজ আমি এই সমস্যা মেটানোর একটা চেষ্টা করছি ।
কেমন হত, যদি আমরা আমাদের অফিসিয়াল মেল এ্যাকাউন্টে লগ ইন না করেই সেই মেল আই.ডি. থেকে মেল পাঠাতে পারতাম ?
অর্থাৎ আমি বলতে চাইছি, ধরুন আপনি লগ ইন করে আছেন [email protected] এ , কিনতু আপনি মেল পাঠাবেন [email protected] থেকে ।
হ্যাঁ , এটি সম্ভব । আমি এখন এটি করার পদ্ধতি দেখাবো । প্রথমেই বলি এটি কেবলমাত্র Gmail ব্যবহারকারীদের ক্ষেত্রেই প্রযোজ্য । নীচে পদ্ধতিটি বিস্তারিত ভাবে ছবি সহ দেখালাম ।
- প্রথমে আপনার Gmail এ্যাকাউন্টে লগ ইন করুন ।
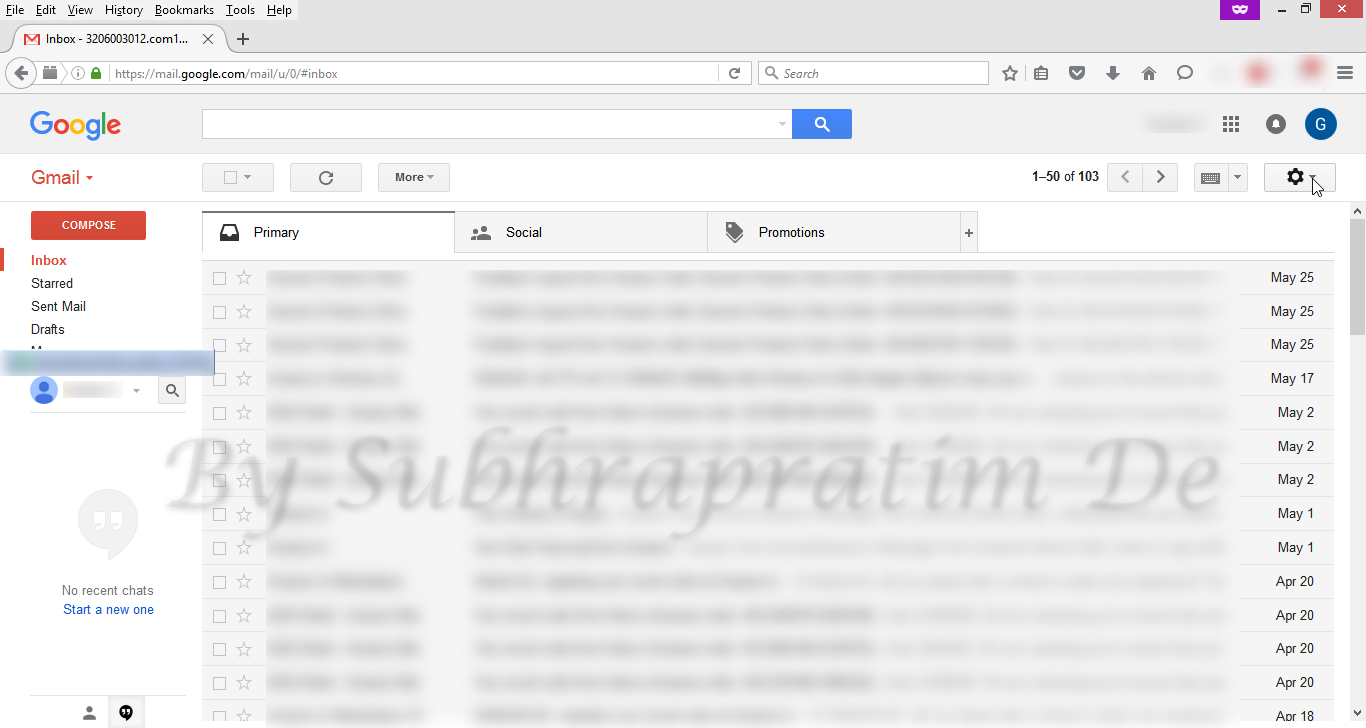
- ছবিতে দেখানো জায়গায় ক্লিক করুন ।

Click the Gear icon - Settings এ ক্লিক করুন ।
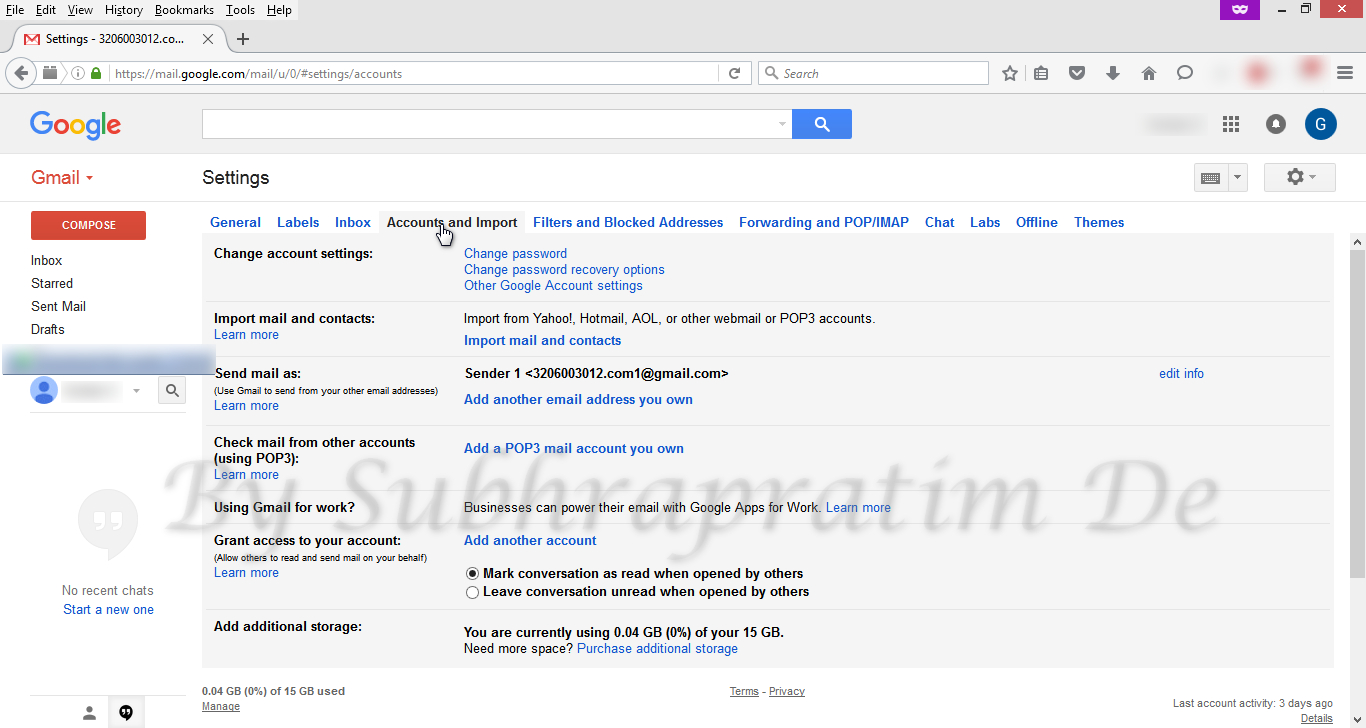
Click Settings - Accounts & Import এ ক্লিক করুন ।
Click Accounts and Import - Add another email address you own এ ক্লিক করুন ।
Click Add another email address you own - পরবর্তী স্ক্রীন এ Name এ যে এ্যাকাউন্ট থেকে পাঠাবেন তার নাম এবং Email এ তার মেল আই.ডি. দিন ।
Add Name and Email - Next Step এ ক্লিক করুন ।
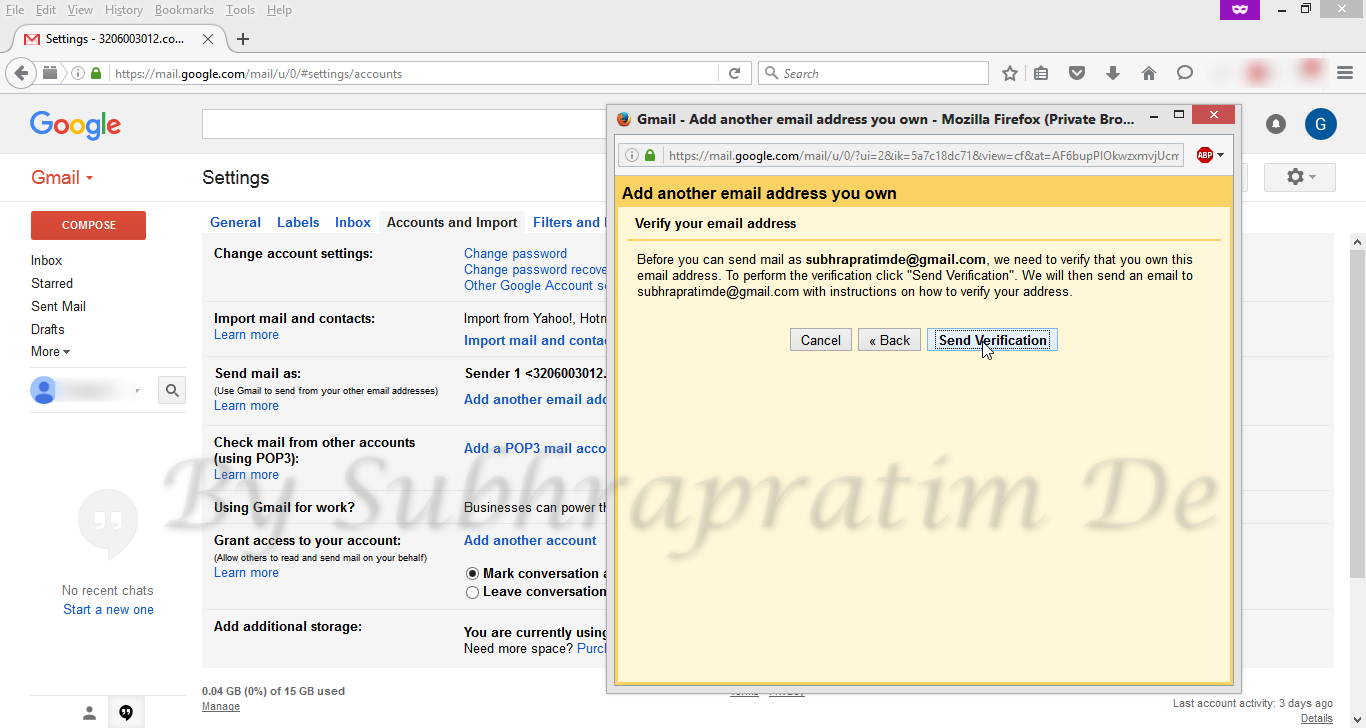
- Send Verification এ ক্লিক করুন ।
Click on Send Verification - অন্য ট্যাবে বা অন্য ব্রাউজারে ৬নং স্টেপ এ যে মেল আই.ডি. দিয়েছিলেন তাতে লগ ইন করুন । দেখবেন Gmail Confirmation থেকে একটি মেল এসেছে । সেটি খুলুন । ওখান থেকে Confirmation code টি কপি করুন । এই আই.ডি. টি লগ আউট করে বন্ধ করে দিন ।

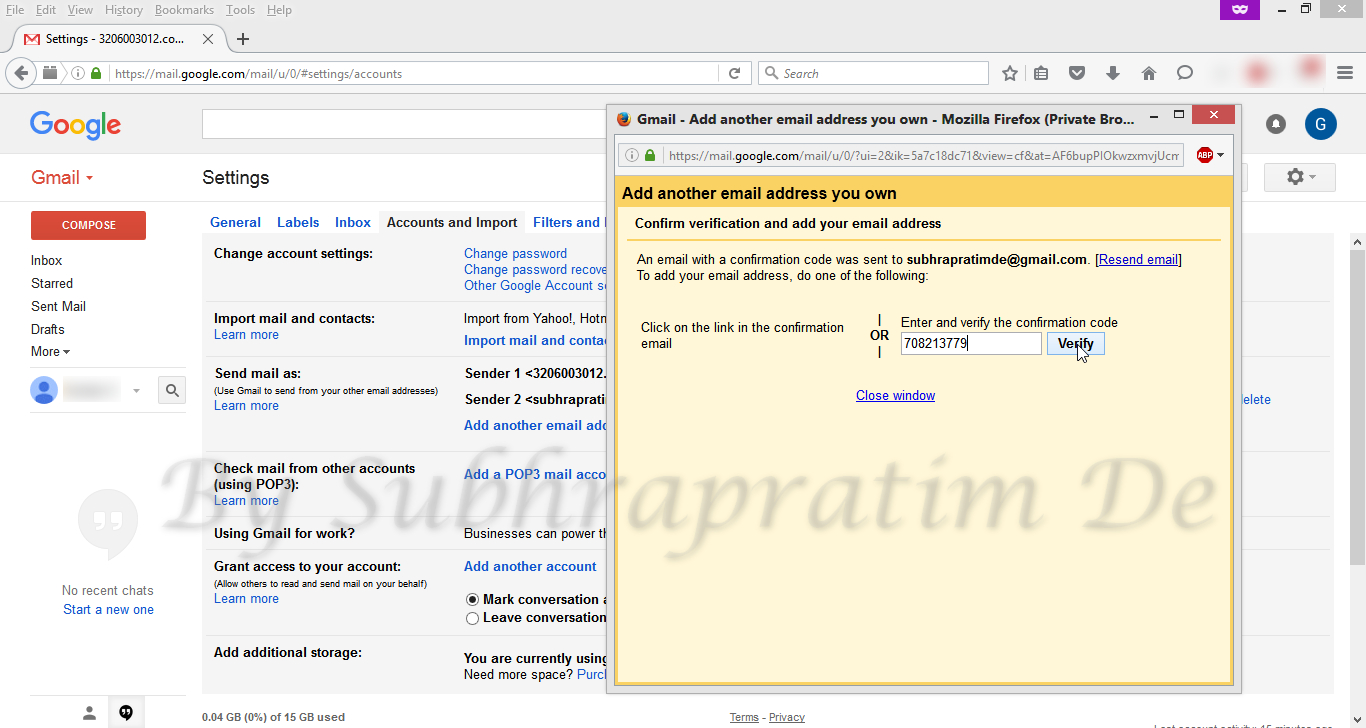
Copy verification code - প্রথম যেখানে কাজ করছিলেন সেখানে ফিরে গিয়ে ঐ কপি করা কোড টি পেষ্ট করুন ।
Paste Verification Code - Verify এ ক্লিক করুন ।
Click Verify Button - দেখতে পাবেন দ্বিতীয় আই.ডি. টি যোগ হয়ে গেছে ।
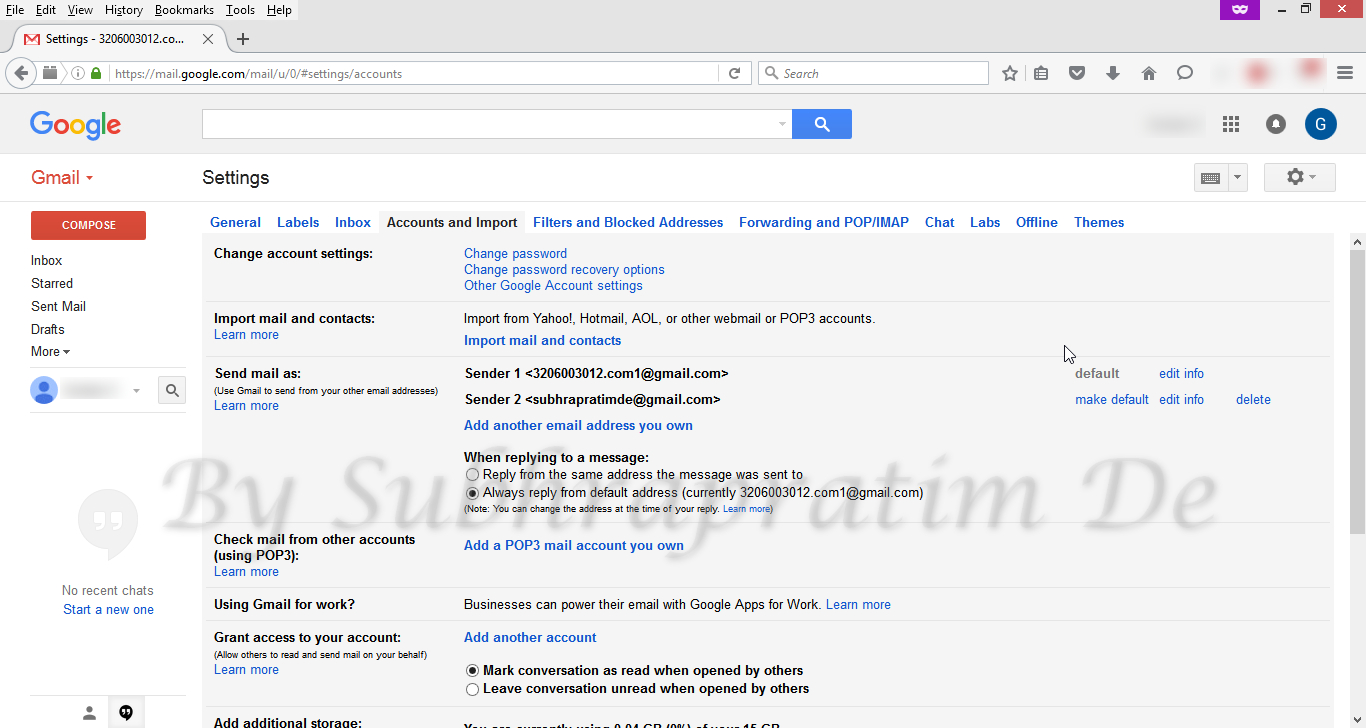
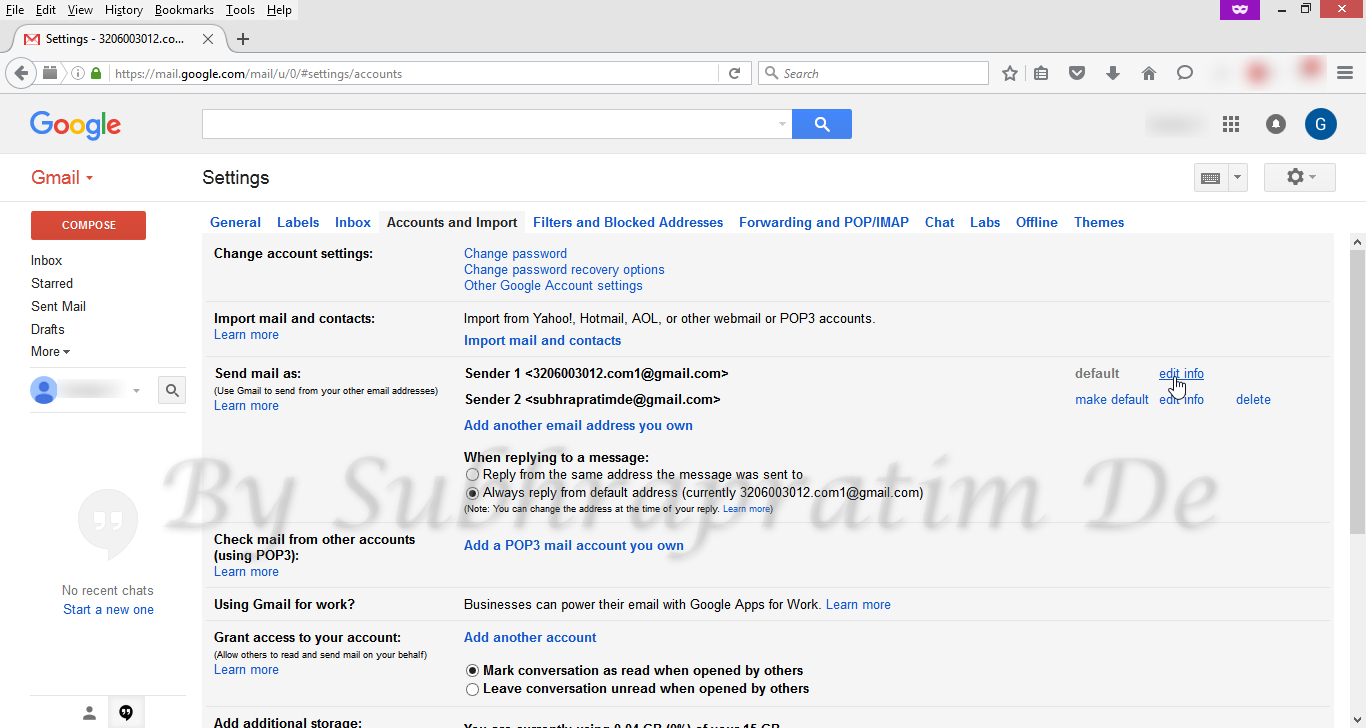
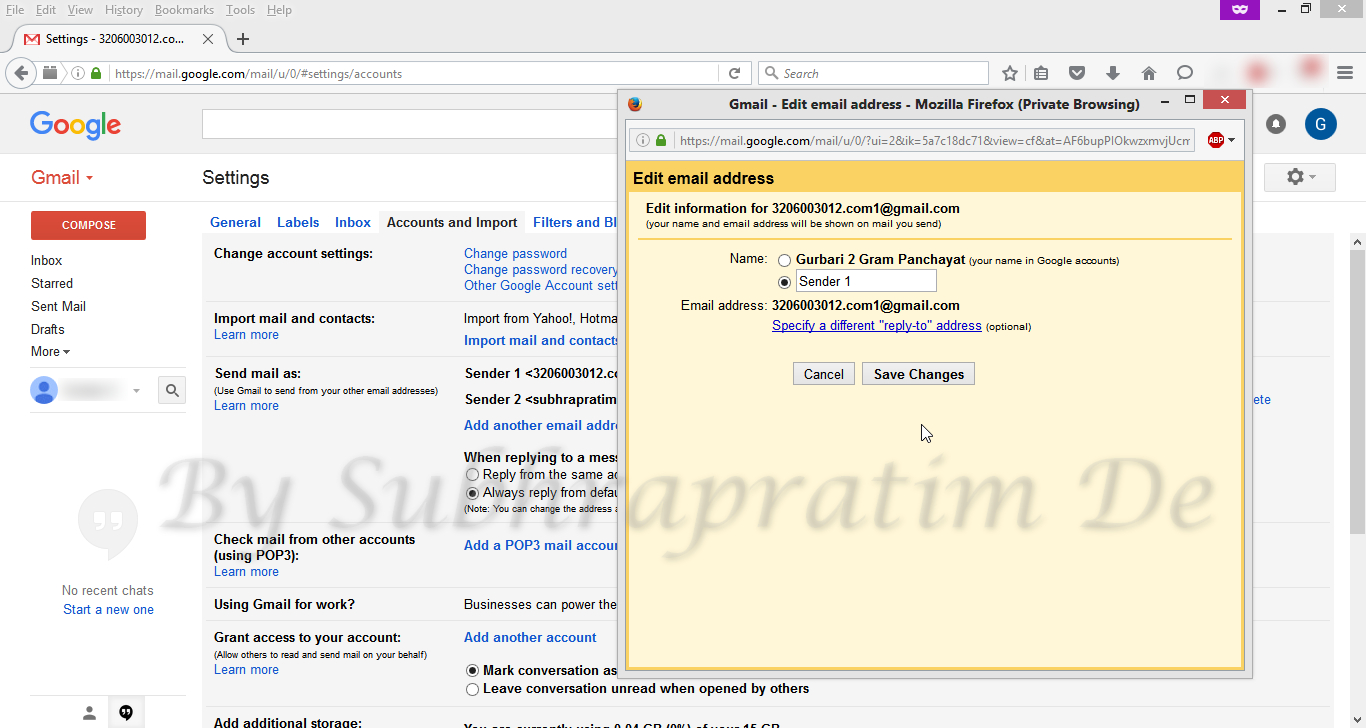
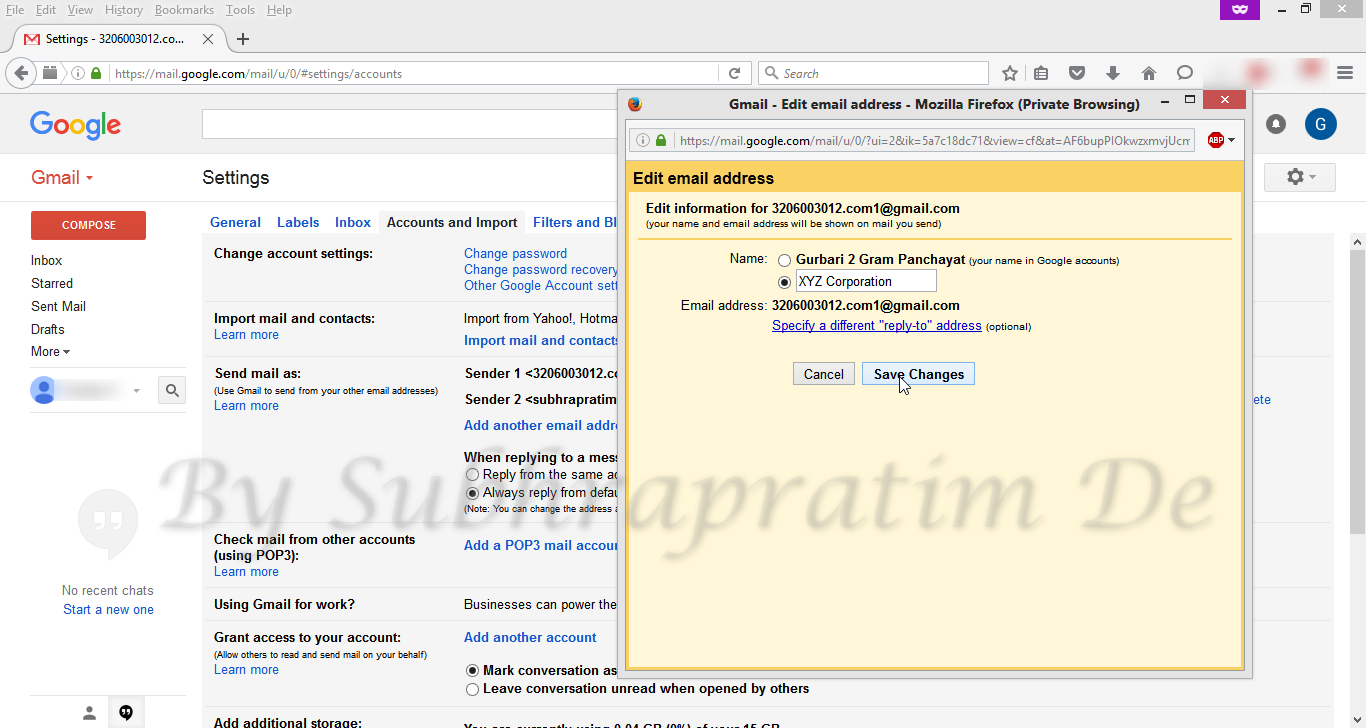
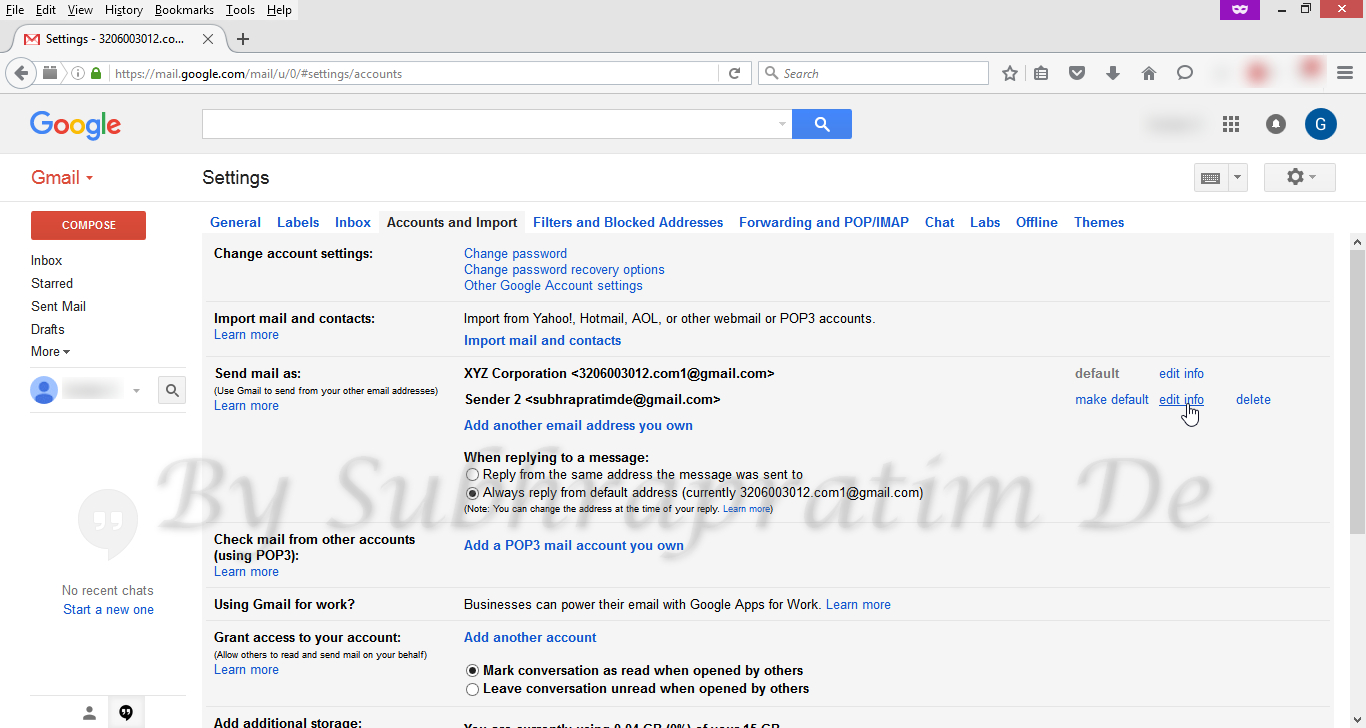
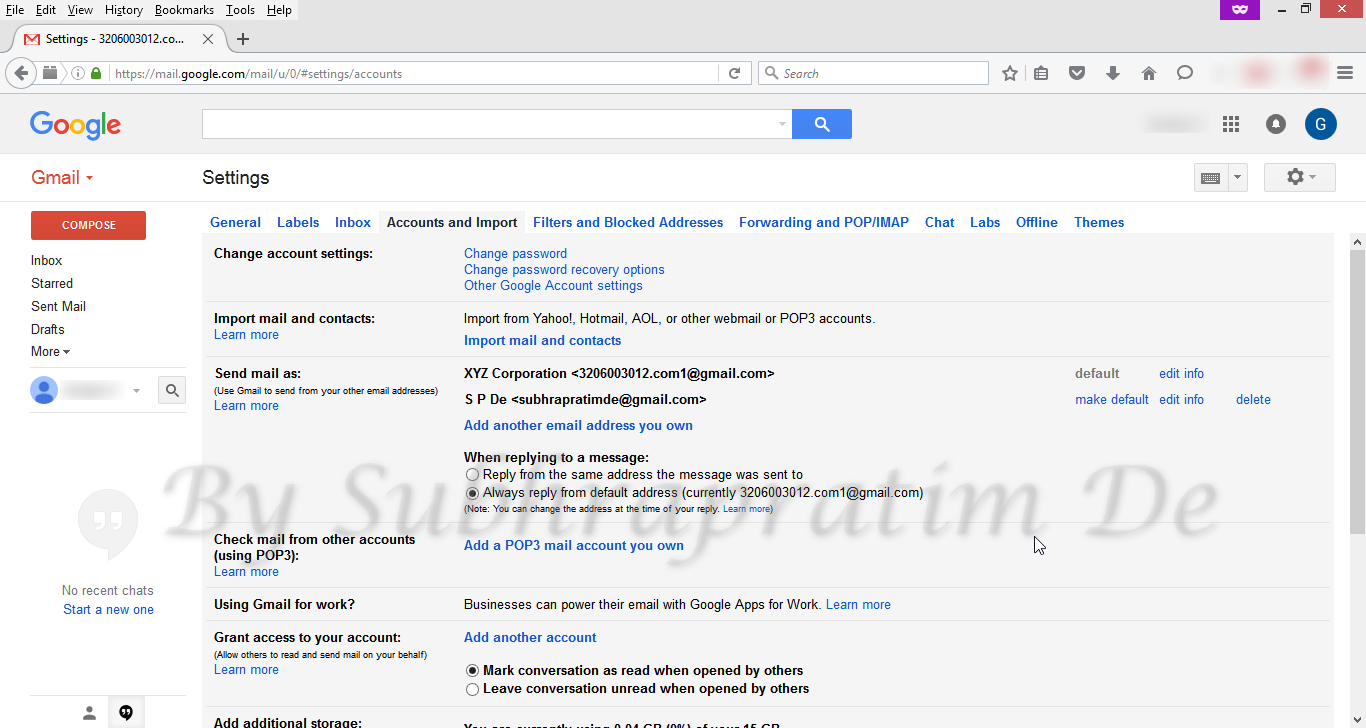
Other ID added - এইভাবে আপনি কোন একটি মেল আই ডি র তথ্য পরিবর্তন করতে পারবেন ।
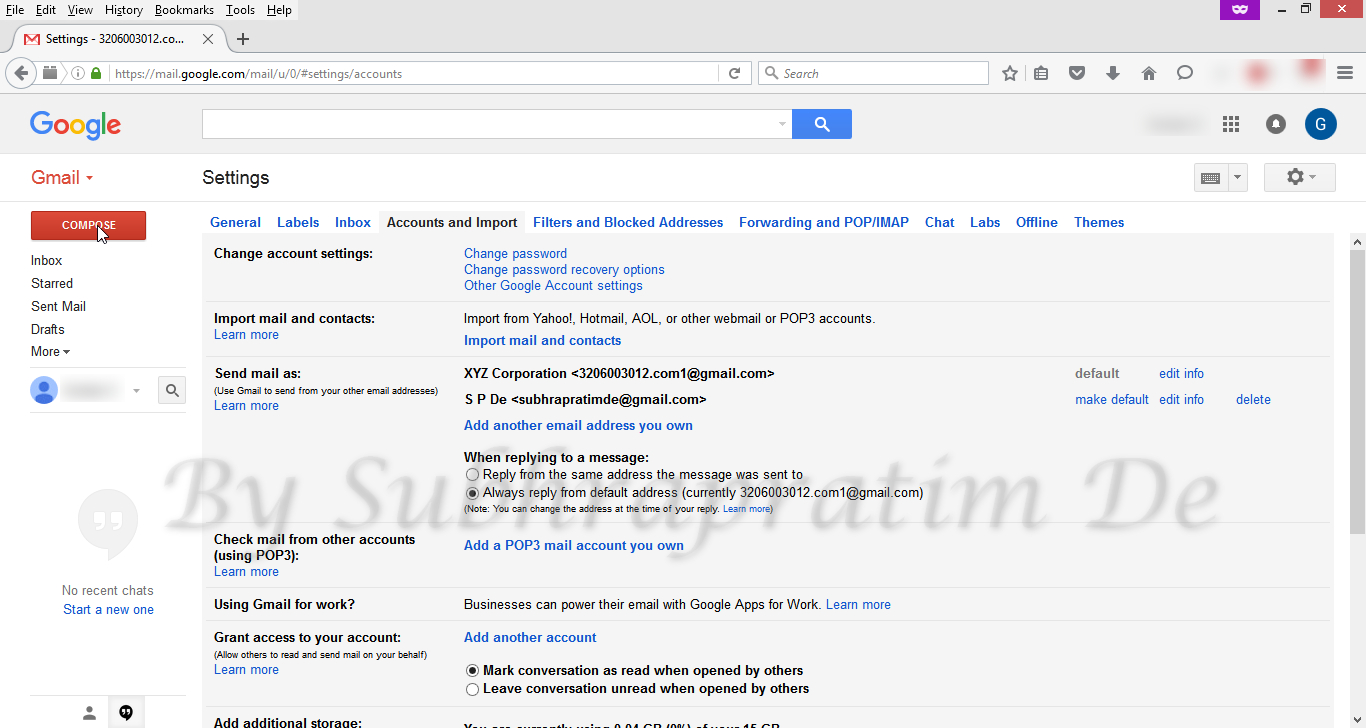
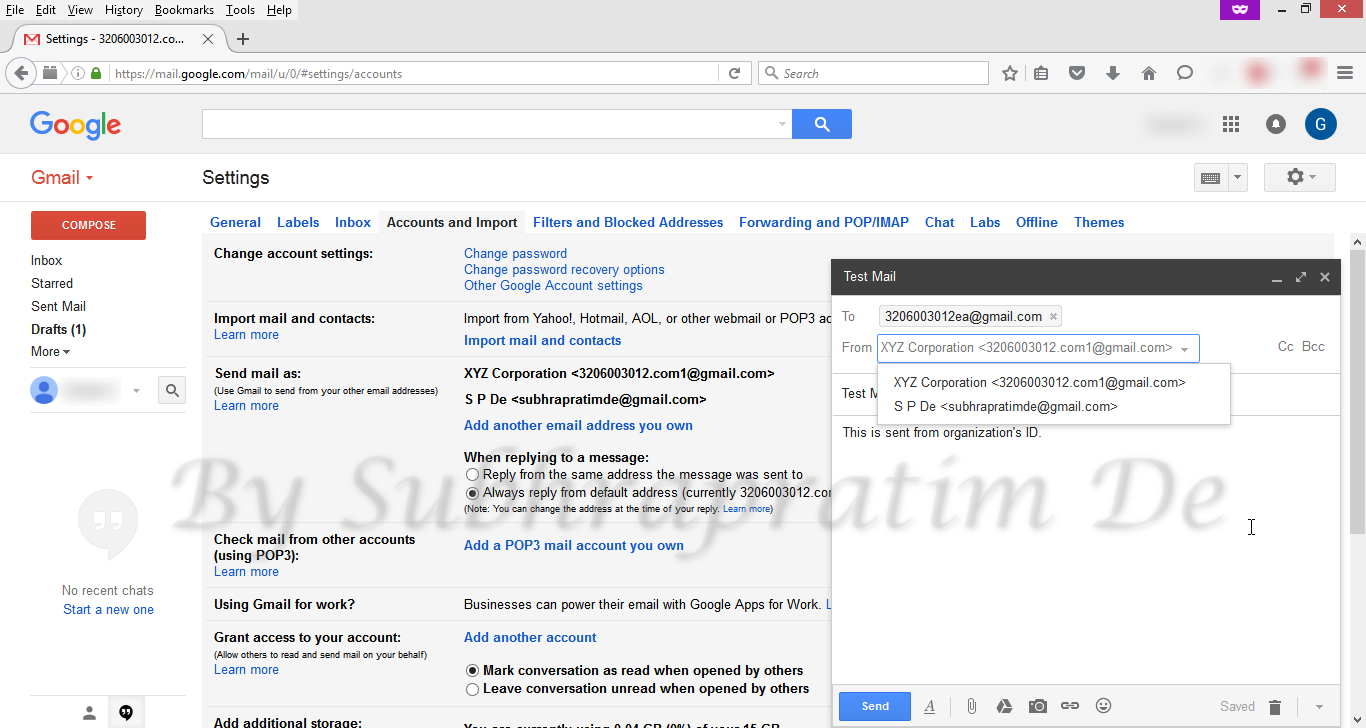
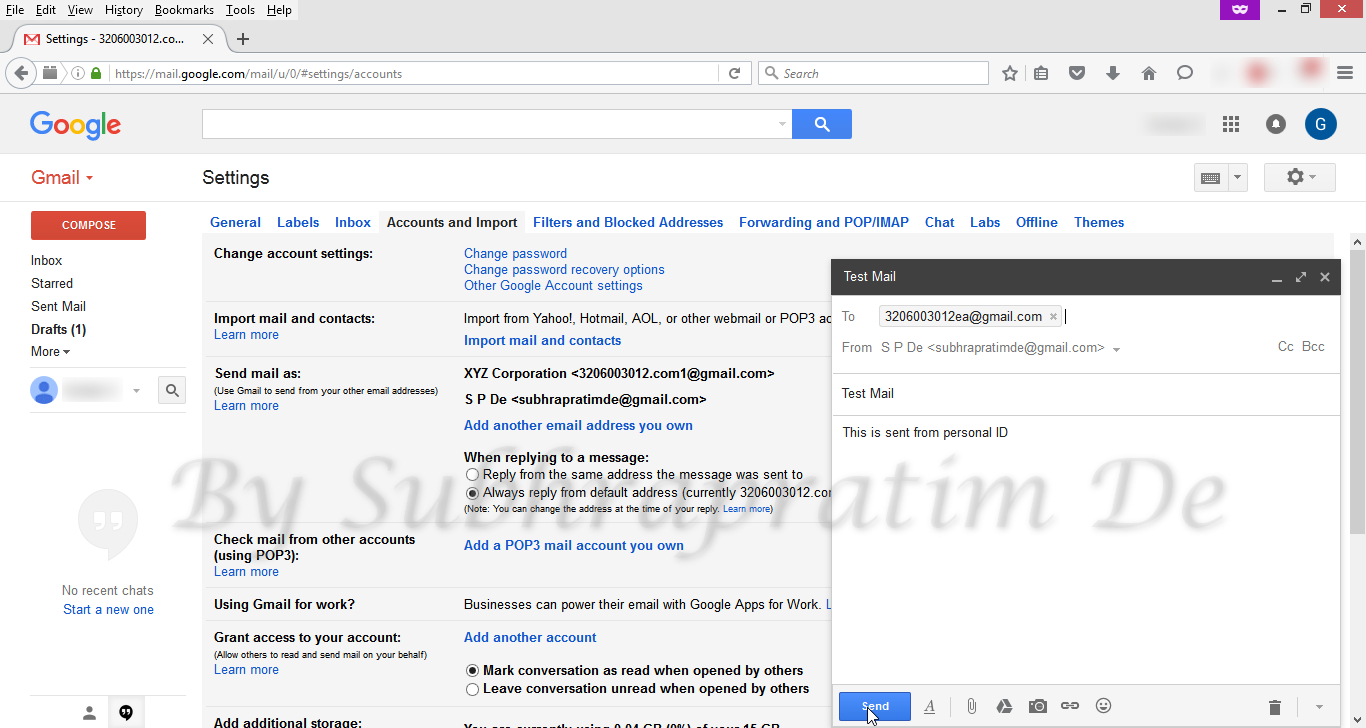
Changing details of an Aliases Changing details of an Aliases 2 Changing details of an Aliases 3 Changing details of an Aliases 4 Changing details of an Aliases 5 Changing details of an Aliases 6 Changing details of an Aliases 7 - এখন আপনি COMPOSE এ ক্লিক করলে From এ আপনার যোগ করা সবগুলি আই.ডি. দেখতে পাবেন।
Compose Mail window - আমি এখানে একজনকে দুটি আই.ডি. থেকেই মেল করলাম ।
Mailing from alias 1 Mailing from alias 2 - তিনি মেল গুলি যেভাবে পেলেন ।
Final receipt








ভালো লাগলে বা কাজে লাগলে আমাকে জানাবেন এই পোষ্টের কমেন্টে ।।
I like this web site very much, Its a real nice spot to read and receive info .
Pretty! This was a really wonderful article. Thank you for supplying this information.
Learn more Google Instant is off due to connection speed
Hello There. I found your blog using msn. This is an extremely well written article. I will be sure to bookmark it and return to read more of your useful information. Thanks for the post. I’ll certainly comeback.
Hi there, just became alert to your blog through Google, and found that it’s truly informative. I am going to watch out for brussels. I will be grateful if you continue this in future. Many people will be benefited from your writing. Cheers!
Hello gentleman do you’ve got new links ? I enjoy article evolve for my friend ‘ ..
Yfter all thats enounced and done I m curious to have word how many peoples truly realise the writer has merely revealed. Thanks.
Hi there! Do you know if they make any plugins to help with SEO?
I’m trying to get my website to rank for some targeted keywords but
I’m not seeing very good results. If you know of any please share.
Cheers! You can read similar article here: Choose
your escape room
Spot on with this write-up, I really suppose this web site needs rather more consideration. most likely be once more to learn much more, thanks for that info.
definitely an interesting read. i usually dont comment. signed captain america