
Finally I am here to publish automated nrega work demand full automation process. As I have said in the previous overview post that the whole process in going to be some kind of technical and/or critical for most of us. So, requesting you to read and implement all the steps carefully before applying them to use. The previous post is the introduction of this post, so read the introduction first. I will be using two extensions for the work. One is Autofill and another is Shortkeys. I have already discussed about the use of autofill in nrega work demand form. Here am going to discuss the usages and configuration of these two extensions. For extension installation you have to refer to that post.
Before I begin here is one declaration from me. If you face any problem regarding this process you have to put your query in the comment section of this post. Also join “NREGA HELPLINE FOR MIS” Facebook group, there you will get all the help from other members. I will only reply these two mediums. Personally calling/messaging me will simply be ignored.
Now going straight to the nrega work demand full automation process :
Step 01 : Install Autofill extension. For extension link Click Here
Step 02 : Install Shortkeys extension. For extension link Click Here
Step 03 : Download Autofill Preset Data from here
Step 04 : Download Shortkeys Preset Data from here
Step 05 : Open Autofill options as shown in the picture below.

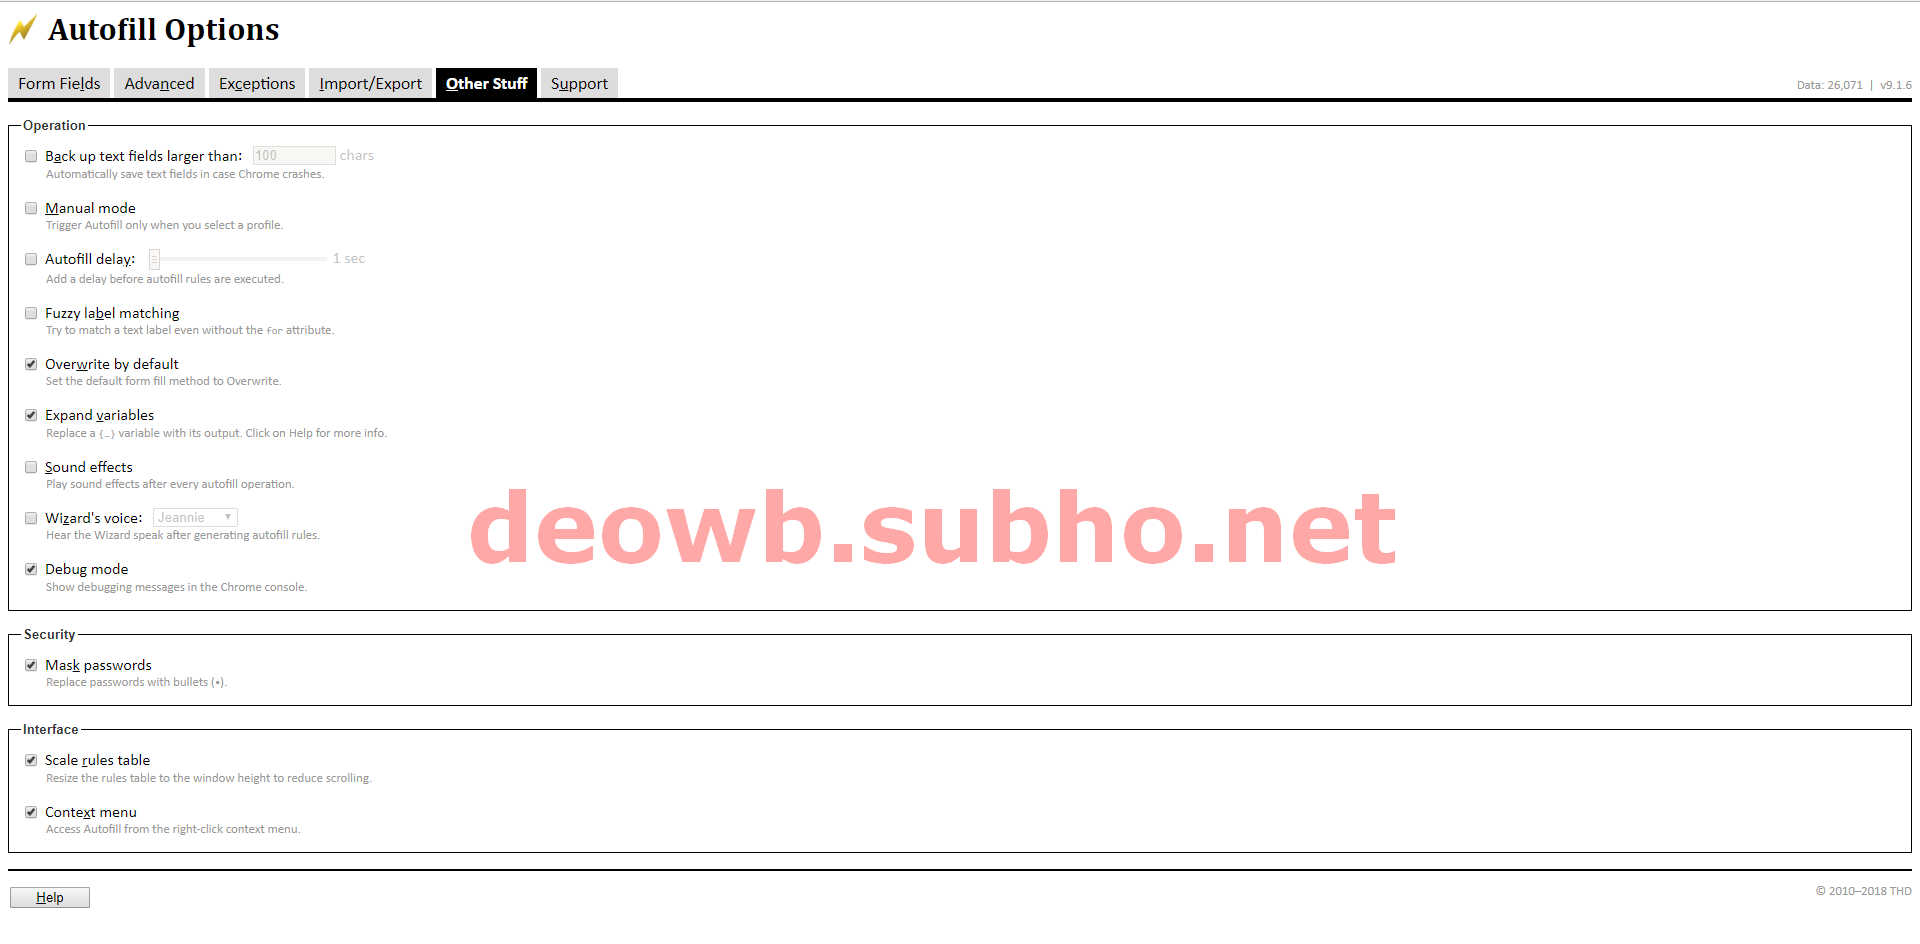
Step 06 : Goto “Other Stuff” tab and set the options as in the picture below. Just set the options, no need to save. All will be autosaved.
Step 07 : Goto “Import/Export” tab.
Step 08 : Open Autofil_Preset_Data_CSV.txt file you downloaded in step 3.
Step 09 : Copy all the contents of the file and paste it.
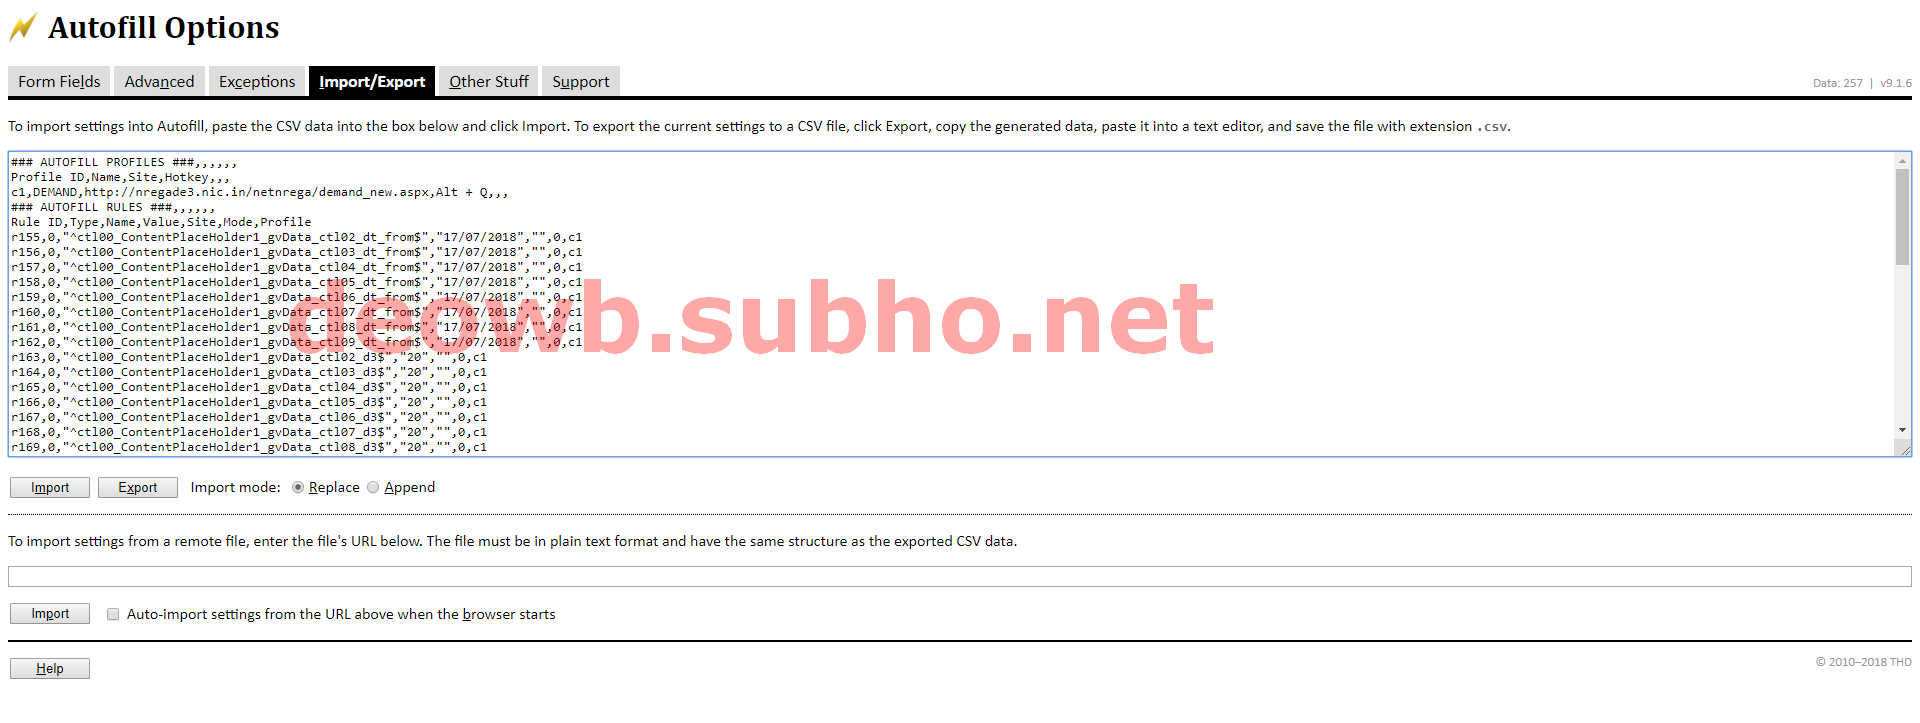
Step 10 : Select “Replace” as Replace Mode. Click “Import” button. Now goto “Form Fields” tab and click “Save” at the bottom left corner. This is a vital part. You must save it.
Thats all the settings you have to do in Autofill extension. Now we will move to Shortkeys extension.
Step 11 : Open Shortkeys options as shown in the picture below.

Step 12 : Goto “Import” Tab.
Step 13 : Open Shortkeys_Preset_Data_JSON.txt file you downloaded in step 4.
Step 14 : Copy all the contents of the file and paste it.
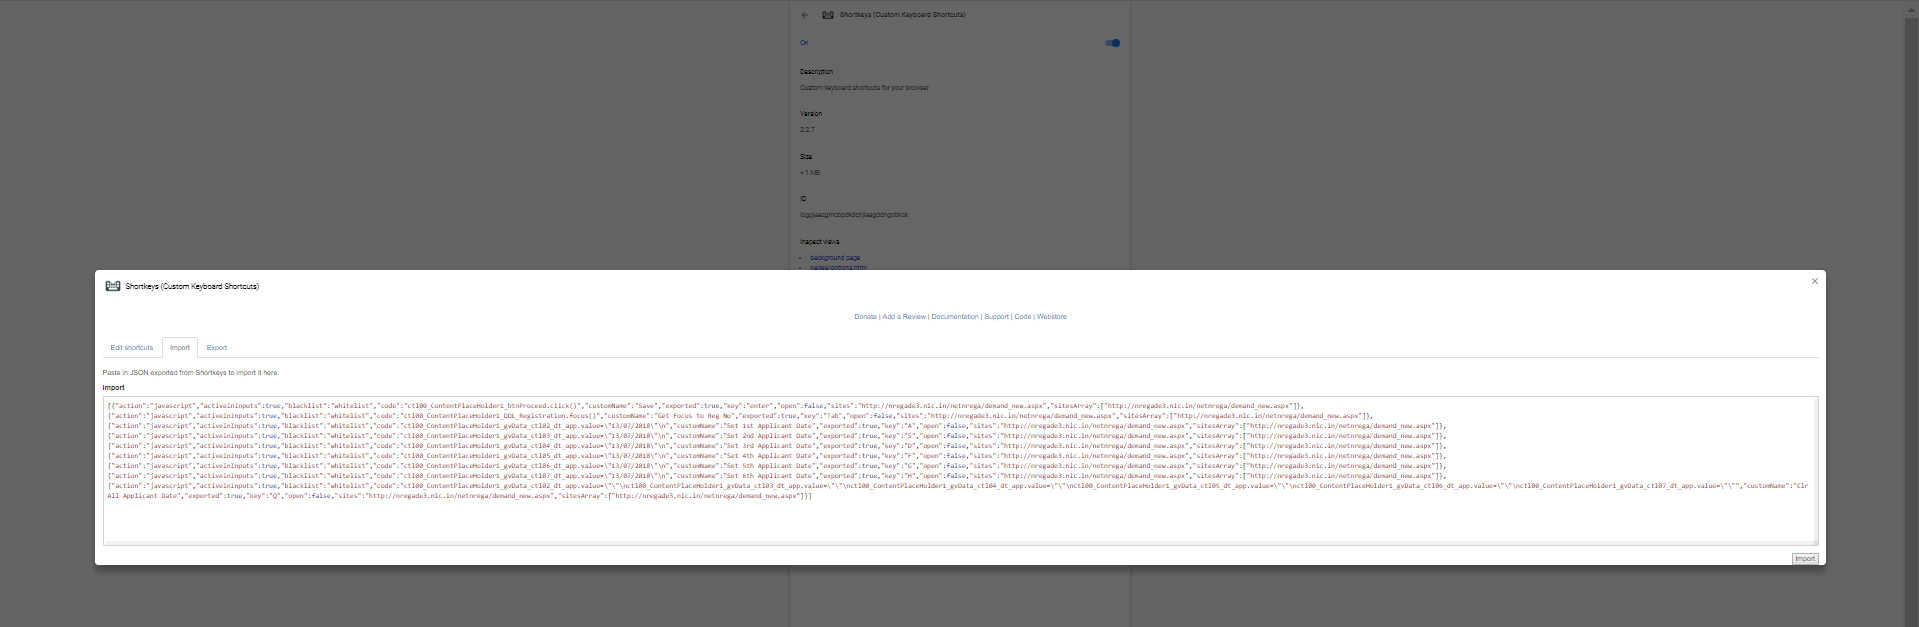
Step 15 : Click “Import” button. And you are done.
Thats all you need to do for nrega demand entry form automation. If you open demand entry page you can see that all Work Demand From/No of Days/Work Demand to field are already filled. Now press A/S/D/F/G/H as per the applicant no you will see Date Of Application will be put. Now press Enter. You will see save confirmation message.
CHANGING NREGA WORK DEMAND FULL AUTOMATION OPTIONS
Here is one thing we have to learn now. How will you change the data? In the following section we will see how to modify dates/days as per our needs.
CHANGING AUTOFILL DATA
Step 1 : Open Autofill Options. You will see the screen like below.

Step 3 : Click Save. It is a must to save.
Step 4 : Now open Shortkeys option. You will get a screen like below.
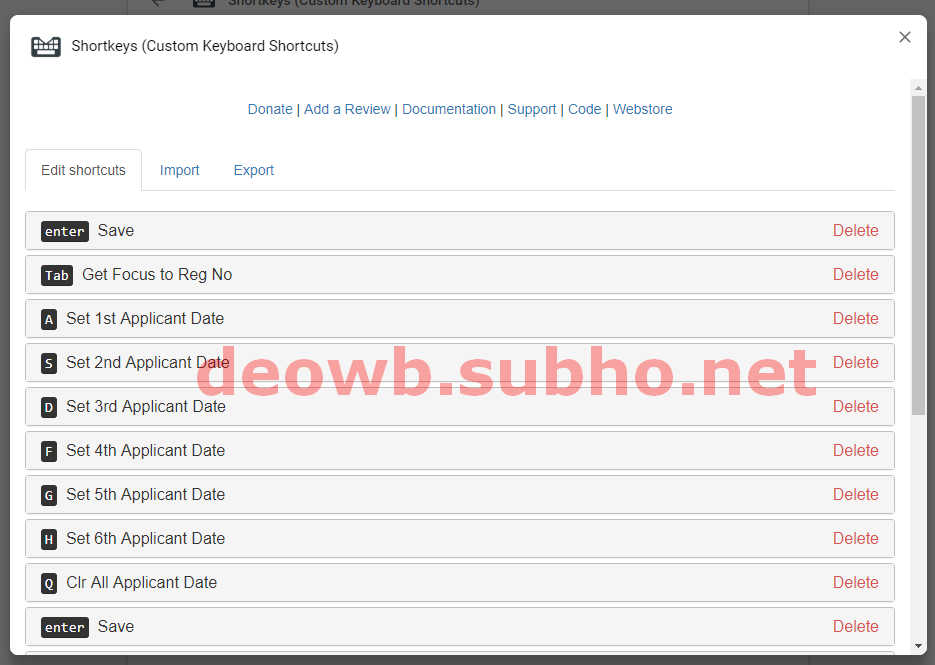
Step 5 : Click on “A Set 1st Applicant Date”. It will look like this.
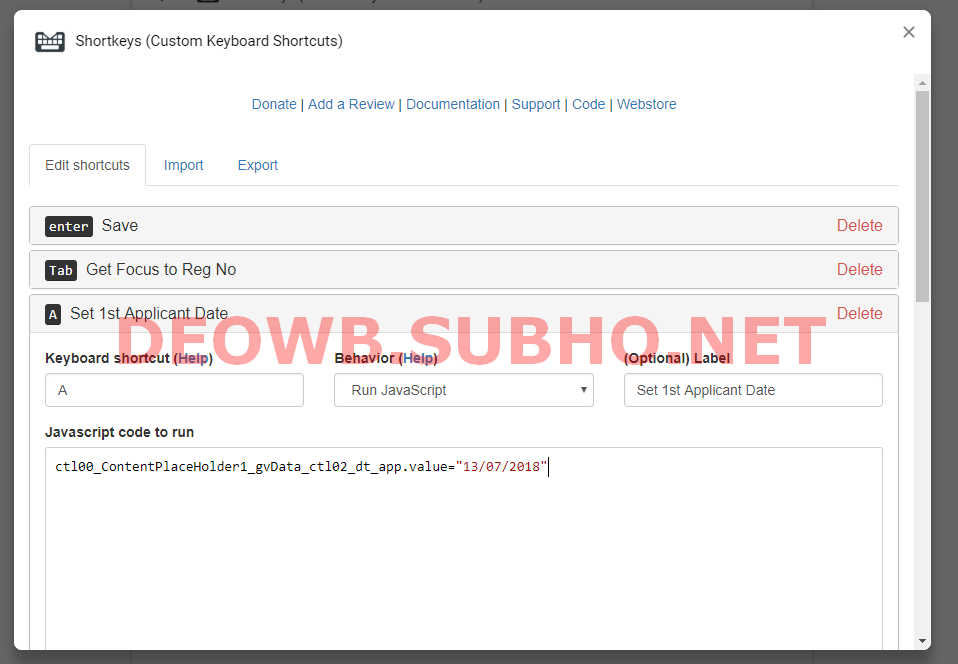
Step 6 : Here you will see a date “13/07/2018”. This is the “Date Of Application” field. Change this date to current date. Date format must be in dd/mm/yyyy format and must be within the double quote.
Step 7 : Change all keys from A to H in this way. Click Save.
Step 8 : Now open demand entry page and start working.
Default Shortcut Keys for nrega work demand full automation procedure:
Tab : Set focus to the registration number selector.
A : Put “Date Of Application” for applicant 1
S : Put “Date Of Application” for applicant 2
D : Put “Date Of Application” for applicant 3
F : Put “Date Of Application” for applicant 4
G : Put “Date Of Application” for applicant 5
H : Put “Date Of Application” for applicant 6
Q : Clear all “Date Of Application” field.
Enter : Submits the form.
That’s all. Everything is now setup. You are now ready to make 4A demand entry. Share with everyone. For any query/suggestion comment it down. Thank you all.